Homework Assignment: Depth of Field
Let’s admit it, we’re now in one of photography’s seasonal doldrums. Fall foliage is over, the trees are bare and snow has not hit much of the area, at least not in the mid-Atlantic, USA, region. This is the perfect time for checking out new equipment, innovative techniques, even changes in attitude toward whatever area of photography you have up to now avoided. In my sporadic “Homework” series (use the search box to find others), I’d like to add the perfect assignment for that rainy Saturday morning.
Depth of Field
I refuse to get into a discussion over the fact that there is no such thing as Depth-of-Field (DOF). We all have a notion of what it means, so physics definitions just don't apply in this blog. Manipulating DOF is an important tool in your photographic toolbox. Some photographers have a hard time visioning its effects when they are actually in the field photographing. Most photographers, if they use bracketing at all, will bracket up and down a stop to get the correct exposure, but how many of you also bracket to experiment with DOF?Again, on a snowy or rainy day, take out your camera and mount it on a tripod. You can do this with a hand-held camera, but it works better using a tripod. Get a yardstick or a tape measure and lay it out on a table. Now stand up a folded playing card (actually, almost any object will do) at the zero point and a couple of inches left or right of the ruler. Take 4 or 5 other cards and place them at 3-inch intervals behind the first card, staggering them closer and closer to the ruler.
Set up your camera-tripod at eye level to the cards. Switch to Aperture-Priority. Focus on the very first card. Starting with f2.8, and without moving your setup, take a photo at each successive f-stop (i.e.: 2.8, 4, 5.6, 8, 11, 16, 22). You may need a cable release to prevent camera shake. Now enlarge the images in-camera or transfer them to your computer to learn from them.
This is also the perfect time of year to conduct this experiment outdoors, since trees are bare of leaves. In a forested area, set up near a tree that has lots of other trees in the background. Shoot as explained above and note the results. This will give you a good idea of how DOF affects an image’s mood and presentation. Do you want to blur the background to achieve your desired effect of isolating your subject? Or, do you want a rich, detailed image that shows clear focus from front to back. The more you experiment with DOF, the better you will become at pre-visualizing its effects on your photography.
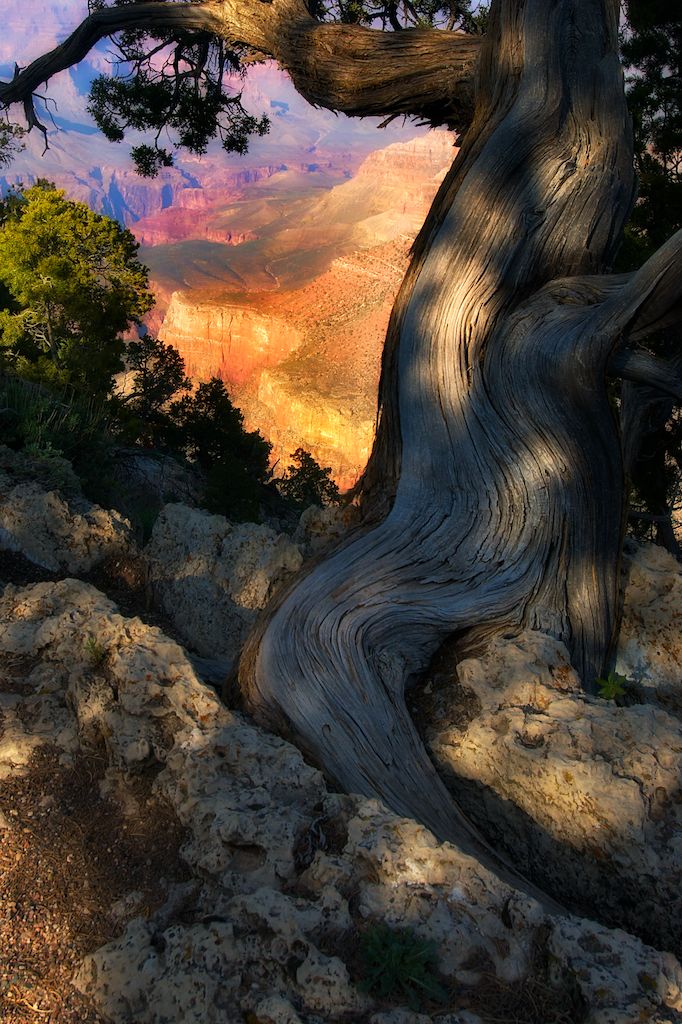
In the above image, I was attracted to this tree that somehow managed to flourish in such a precarious environment, growing from cracks in the rock poised near the edge of the Grand Canyon. I pre-visualized the image I wanted and knew that if I shot wide open, meaning at f/2.8, 4 or 5.6, the background would render blurry and unrecognizable. So I shot at f/11 and 16, as shown here. I like the effect of placing the gnarled tree in the context of its magnificent setting.