Get Better Photos: Shoot Early, Shoot Late
“How do you get such saturated colors in the sky?” I am often asked.
“I bet you use fancy filters.”
“Hey, you added those colors in Photoshop, didn’t you?” wink, wink.
Well, I hate to disillusion you, but those colors come from something called sunrise. Pure, natural, 100% organic sunrise. And to capture them you have to get up before sunrise, trek to your preferred location, set up your equipment, pray that it doesn’t rain or cloud over, and then spend the next hour shooting like a maniac.
While everyone else is out having a good time during the day, I’m stumbling about in a sleep-deprived daze. Then, around dinnertime, I pull out one solid excuse from my Photographer’s Handbook, and sneak away for another hour of sunset shots. That, in a nutshell, is how a pro photographer captures those magical colors in the sky.
Sunrise, Sunset: The Magic Hours
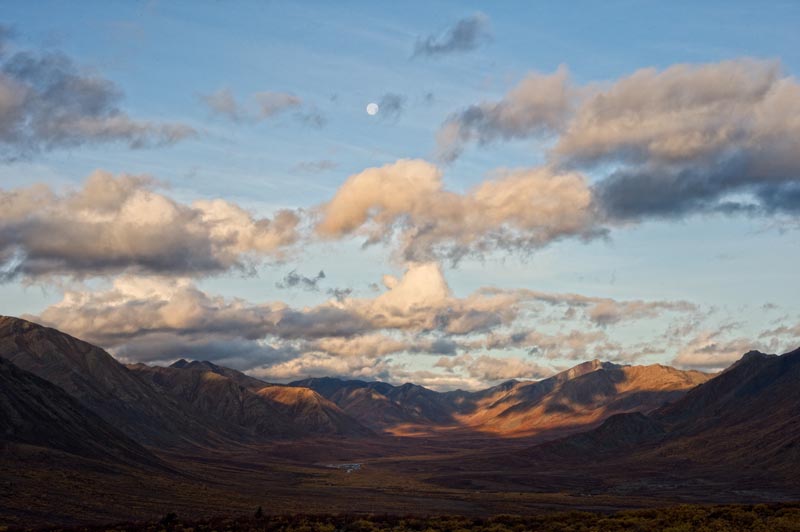
In fact, photographers call the two hours after sunrise and before sunset the ‘magic hours.’ From the perspective of physics that makes sense. When the sun is nearly at the horizon light is penetrating considerably more atmosphere than it does at noon. That slows light down and slower light bends it toward the red end of the visible light spectrum. We humans have a proclivity for reddish colors. They seem ‘warmer’ and more pleasing and peace-inducing to our brains.Early-Late light also has other properties that tend to transform snapshots into eye-candy. When the sun is low to the horizon it creates longer shadows. That adds depth and texture to images, especially to landscapes.
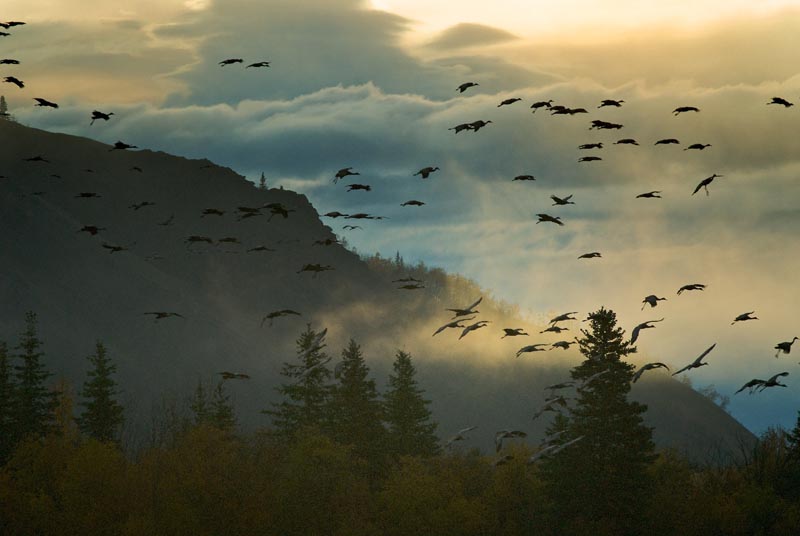
Sunrise and sunset are appealing to photographers for another reason. They are typically the hours when wildlife is most active, so your chances of capturing that perfect image of a fox or a bear or any manner of feathered creatures rise exponentially.
If you are traveling abroad, the hours just after sunrise are terrific for photographing local markets. There is typically a lot of hustle and bustle during that period, so with a medium telephoto lens you can stand unobtrusively in a doorway and shoot people setting up their stalls and arranging their exotic wares. (If you intend to use the images for commercial publication, be sure to get model releases from the people you photograph if they are recognizable in the photo… more on that in a later blog).
Sunset is an equally magical time to shoot, although you will most definitely run into more photographers at sunset than at sunrise. Sometimes the fight for photographic territory can be intense at sunset in places like the South Rim of the Grand Canyon.
Whatever its challenges, the aesthetic rewards of shooting early and late easily make it worthwhile. And don’t think you need to travel to some exotic locale. Just set your alarm and witness your own backyard in a totally different perspective.
Once, while in Canada’s Yukon Territory, I set my alarm for 1:00 AM to photograph the spectacular northern lights over the Yukon River. Later that morning, one of my local hosts asked what I was doing up so early. I mentioned my drive to get a good view of the aurora. He had lived in the Yukon for five years. He flat out told me that he had only seen the lights once!
Equipment You Will Need
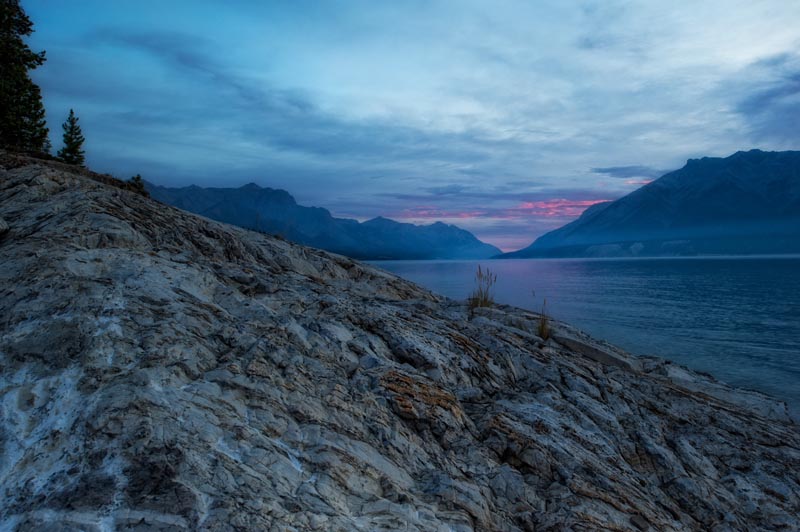
In terms of equipment I always use my tripod for sunrise/sunset because I want maximum depth-of-field, which slows the shutter speed. Add a cable release and you are set… well, almost. I also use filters at sunrise and sunset.When you photograph sunrise/sunset, the sky begins to light up while the land in the foreground is still relatively dark. The lighter sky fools your meter into thinking it needs to close down the aperture to restrict the light hitting the sensor. That will render the foreground black, with no details in the shadows.
The way to compensate for this is to use a graduated neutral density filter. A GND filter is a piece of plastic or glass that you place in front of the lens. It is darker at the top and gradually becomes transparent about halfway down. In essence you are putting sunglasses only on the sky portion of your image.
Just slide the filter until only the sky is shaded and- voila! – you have the perfect sunrise image. GND filters come is various strengths and with trial and error, and liberal use of the histogram, you will become proficient in their use. I use GNDs from Singh Ray (www.singhray.com) and Lee filters (www.leefiltersusa.com) or you can purchase them through B&H (www.bandh.com) or Adorama (www.adorama.com). In a future blog I’ll explain how to use these GNDs in more detail.
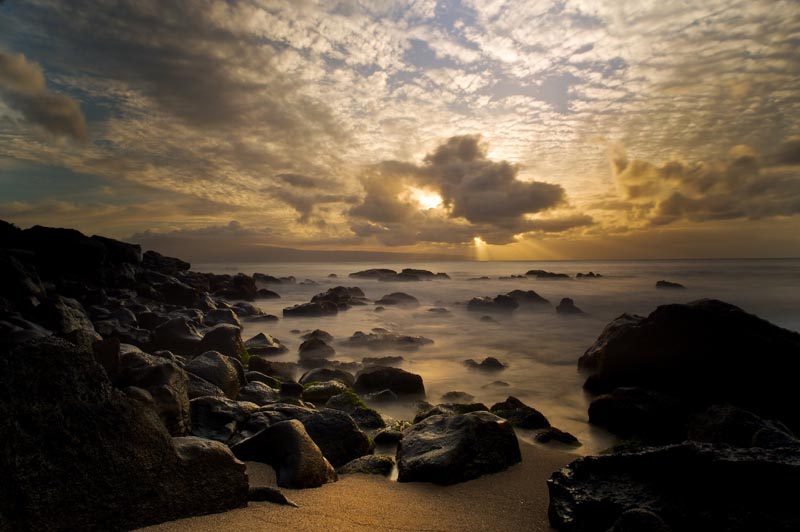
Singh-Ray makes a specialty filter known as a Daryl Benson Reverse Neutral Density Graduated Filter. I know that’s a mouthful, but here’s what it does that proves very useful. Let’s say you want to shoot a sunrise where the sun is just peeking up over the horizon. That bright orb will blow out your shot and ruin your image. The Reverse ND filter places a band of ‘sunglasses’ right across the horizon zone, holding back some of that light and allowing for a nicely exposed image in most cases.
Try getting up tomorrow before dawn and you’ll be amazed at what awaits in your own town or neighborhood!